Tuesday, January 31, 2012

Curly hair products {that I use}

Some of you may remember this post that I wrote about curly hair before...well, I lost that Curly Girl book. I loaned it to a friend that moved away. I went back onto Amazon.com and ordered myself a new copy. Of course, they didn't have the old edition, but a fancy new edition with DVD. I ordered it and have been enjoying it with my daughter.

My daughter has a wonderful, amazingly smart friend that has curly/wavy hair. We decided to buy the new Curly Girl edition for her friend for Christmas (actually I suggested it, and my daughter paid for it with her baby-sitting $ !) Her friend has been enjoying it, and I thought I would post about what products I used, so she could have a little help on good curly hair products to buy.

These are not the only curly hair products that are good for hair, but these are good ones that I use and like. I have read the labels thoroughly (or so I think!) and haven't found anything harmful according to the Curly Girl book. My sister is also a Curly Girl" and she uses different products than I do. I know she used to use Biolage, which are wonderful but expensive. I'm not sure what she currently purchases and uses on her curly hair.
ALOE VERA GEL
BY FRUIT OF THE EARTH (FOTE)
My favorite gel is light and clear, so it is fine to use on hair. It even states on the back of the bottle to try it in your hair! It contains NO alcohol (which is a drying agent) and no fragrance. I like that is natural too! Hint: I've found it most often at Wal-mart, on the bottom shelf in the lotions aisle. It is about $3 a bottle, and in the summer they offer larger bottles with pumps- so watch for them, they're so much nicer to use!

JASON RESTORATIVE BIOTIN
PURE NATURAL SHAMPOO
This is a wonderfully light cleansing shampoo, which has NO parabens, SLS (Sodium Laureth Sulfate) and no Phthlates, which are all listed in the Curly Girl book as bad for curly hair. (I think SLS is bad for humans altogether, as it is a floor cleaner!) My hair feels very light and clean after I use it, and I mostly scrub it into my scalp. Oh-- and I wrote the company from their website, and they sent me 2 $1 off coupons! Gotta love that! I found this in the Natural products section in our local supermarket.

HYDRATING TEATREE MINT CONDITIONER
by Organix
I've found this affordable hydrating conditioner by Organix, and I like it. My hair really soaks it up! A cousin recommended this conditioner to me, as he uses it.

I reallllly like another one called "Root Awakening" by John Freida, but it is a little costly. I am waiting for it to go on sale again, and then maybe I'll buy it. Root Awakening is a little costly, but it made my hair feel very light and airy.
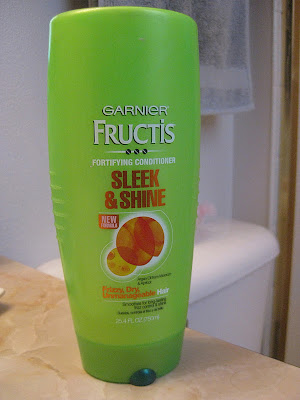
GARNIER FRUCTIS
FORTIFYING CONDITIONER
SLEEK & SHINE
This is the conditioner that I have used the most often in the past few years. It is good, maybe not the best, but this is what I buy for my daughter. It states that it is for Frizzy, Dry Unmanageable Hair, and it is moisturizing. It is a very good lower cost alternative.

GARNIER FRUCTIS STYLE
CURL SHAPING SPRAY GEL

This is one of my staple products that I use everyday in accompaniment with the FOTE gel. It is a good finishing spray, helps tame a few extra frizzes and bring out more curl. I can tell when I've put too much in, but I like the hold and definition that it gives.

I like this Bible verse and how it relates...  "Indeed, the very hairs of your head are all numbered. Don’t be afraid; you are worth more than many sparrows." Luke 12:7
What curly hair products do you use, that you can recommend to me? I'd love to hear your comments and thoughts!

Monday, January 30, 2012

Music Monday: "Your Heart"

I like a lot of Christian musicians, and one of them that I enjoy listening to is Chris Tomlin. I recently purchased a compilation album called, "Music Inspired by The Story". All of the songs on the CD are based on a character in the Bible, to go along with a book by Max Lucado (a Christian author that I sometimes enjoy!) I have been LOVING the whole CD! It is filled with meaningful, picturesque lyrics and a variety of music types, as well as many different singers lending their voices to the project. You can read more about The Story music here. You may have heard a song on the radio from this CD, called "I'm with You" sung by Amy Grant and Nichole Nordeman. I enjoy that song too, since I enjoy Amy and Nichole as Christian music artists.

The lyrics (for all songs) were written by Nichole Nordeman and this song is sung by Chris Tomlin. "Your Heart" is the song about King David. The chorus is based on this verse:

Acts 13:22 (NIV)

After removing Saul, he made David their king. God testified concerning him: ‘I have found David son of Jesse, a man after my own heart; he will do everything I want him to do.’

Below are the lyrics to this powerful song. I hope you'll take a minute to listen to it, following the link below the lyrics.

Your Heart- Chris TomlinIt never was about the oil dripping from my head
I never did dream beyond the pastures I could tend
It never was about the praise, not about the street parade
I didn’t really need a crowd when Goliath fell down

I never meant to woo a king with simple shepherd songs
Or hide away inside a cave, safe from danger’s arms
I never meant to wear a crown, or try to bring armies down
It never was about me and who I hoped to be

At the end of the day, I wanna hear people say
My heart looks like Your heart, my heart looks like Your heart
When the world looks at me, let them agree
That my heart looks like Your heart, my heart looks like Your heart

I never thought I would be much more than Jesse’s kin
Who would ever dream a king would come from Bethlehem?
I know that I’ve crashed and burned, lives have been overturned
But You redeem everything, yeah, even me

At the end of the day, I want to hear people say
That my heart looks like Your heart, my heart looks like Your heart
When the world looks at me, I pray all they see
Is my heart looks like Your heart, my heart looks like Your heart

Five little stones, or a royal robe
Shepherd or king doesn’t mean a thing
At the end of the day

At the end of the day, I wanna hear people say
That my heart looks like Your heart, my heart looks like Your heart
Unashamed I will dance, In Your name, lift my hands
‘Til my heart looks like Your heart, my heart looks like Your heart 

Chris Tomlin / Nordeman/Bernie Herms (arr.)


You can listen to the song here.

Friday, January 27, 2012

Easy Crock Pot Roast- Recipe

This is a recipe that I recently tried from AllRecipes.com, and I liked it! It really was easy and smelled SOOO good! I tweaked it a little to fit what I had, and I would definitely make it again!

Easy Pot Roast (made in the slow cooker)
Prep time: 10 minutes
Cook time: 5 hours
Serves: 6
Bubbling pot of deliciousness!
Ingredients
  • 3 pounds beef roast (I used a rump roast, but any cut will do)
  • 6 potatoes (I had 3, so that's what I used)
  • 1 1/2 cups baby carrots
  • 1 yellow onion (I used white)
  • 2 stalks celery
  • 3 cubes beef bouillon
  • 1/2 cup water

Directions

  1. Cut up potatoes, onions, and celery in to fairly large chunks and place in a slow cooker. Put roast on top of vegetables. Place 3 bouillon cubes randomly on top of roast and pour in water.
  2. Cover, and cook on low for 6 to 8 hours or High for 4 to 5 hours.
Here is another crock pot beef roast recipe you can check out!
Met me know if you try it, I'd love to hear your review!

Thursday, January 26, 2012

American Girl class: Addy Week 1

Our American Girl classes began again this week after our Christmas break. Our co-op is offering some new classes, so I have some new girls in my classes that I am looking forward to getting to know! Over the break, I was busy reading the Addy books and getting ready for the American Girl class. I enjoyed the books! The topics are somewhat sensitive (slavery, Civil War era, segregation, etc.,) so as a parent you may need to temper what your child is ready to hear and learn. I will try to be gentle, but slavery was real and it is an important part of our history to understand.

In book 1, Meet Addy, she flees the life of slavery by running away with her mother. It is a great story, and I know I cheered for Addy & Momma during the whole book! Here are some highlights from our first week of Addy:

Our craft was a cowrie shell necklace and a kerchief. We used an overhand knot to tie the shell onto the 20" black cord. Then we tied a regular knot to slide them over the girls' heads.  They were quick to make, but I think the girls enjoyed making them!


Girls showing off their cowrie shell necklaces...

Just like the one Addy had, which was her great-grandmother's!


Before we ate snack, we talked about what we had for breakfast and lunch that day. Was it the same thing? No, it was different for all of us. We all couldn't imagine having to eat only cornmeal mush for breakfast and dinner each day. We discussed how Addy may not have eaten lunch, because they didn't have anything to eat... The girls did like the fried cornbread that we had, but the mush, not so much!

We had cornmeal mush for snack, since that is what Addy ate in our book. You can find the recipe here.

We did our geography notebooks, with pages on North Carolina, Pennsylvania and the United States map.
(see links below to print)

For the kerchief, I gave each girl one 18" X 20" piece of fabric. Then I showed them how to tie the opposite corners so it was a little sack. Addy has a kerchief like this on the cover of the first book, ours was a little smaller. In her kerchief, Addy kept her necklace, half-dime, a drinking gourd, and maybe food.

When I asked the girls to show me their necklaces, several pulled them out of their kerchiefs!

Cuties!


You can find the geography pages here:
North Carolina, Pennsylvania, United States-- we found the state she first lived in (N.C.) and also found the state she travelled to (Penn.), and we discussed which states she may have travelled through on her journey with her Momma. Here are two more pages about Philadelphia that the girls can print and color on their own:
Liberty Bell dot-to-dot
Independence Hall coloring page

I als read several pages out of Welcome to Addy's World, about slavery and we discussed the "Underground Railroad" and what that term meant. I wanted to read another book, but we ran out of time!

It was a fun day and I am looking forward to Addy Week 2!

Wednesday, January 25, 2012

Favorite family picture

My sister-in-law recently posted her favorite family picture, and I loved it. I love that picture of my hubby and his family. You can see that picture and post here.
I had to find and scan my family picture that is my favorite. We've had other lovely family pictures, but none as funny as this one. So I will dip back into history for this picture and story.

Here is the story behind this fabulous picture:

Our family hosted a foreign exchange student from Germany when I was in 7th grade. Her name is (and we still hear from her!) Bettina. We didn't have too many photo places in our smallish Colorado town, at least that were economical for our large family. With Bettina, we had six kids for the year. We enjoyed it, but realized there are some things that are just not easy...

When Kmart advertised that they were having a temporary photo studio set up, with deals on the pictures, our family decided to go for it. So we dressed up in our Sunday best and traipsed down to our local Kmart on Saturday. Well, so did half of our town on that day. We waited in line. A long line. We waited and waited. My younger brother and sister were about two and four at the time. We all got tired of waiting and antsy. We got tired and frustrated. We made friends in that line with other Kmart photo customers. I remember waiting for TWO hours. 

We finally got to the front of the line, our information all ready to go, and then... we found out a little piece of news. Not good news. Frustrating news. They couldn't move the camera, so they weren't really ready for a large family. Oh no, um, ok... let's do the picture anyway. We waited all this time. 

A few snaps later, this is the gem that we got:
.
I love the non-smile on my Dad's and younger sister's faces, love the 80's hair-styles that we had, love the big glasses, love that we are all crammed in the frame together, some faces closer than others. It makes me smile to see this picture. It makes me laugh out loud. 

So let that be a lesson to you, when they can't move the camera for your family picture, you may just end up with a funny picture and a great family memory!

Tuesday, January 24, 2012

Owl paper bag puppet {Kindergarten craft}

In our homeschool kindergarten this past week, we had O week. We read Owl Moon and Owl Babies, two favorite books that we own about owls. We discussed when owls are awake (nocturnal), what they eat, (mice, small birds, etc.,), where they live, and looked at the variety of owls in our bird book.

To enhance our learning, we also made a paper bag owl puppet. It was fun and easy!
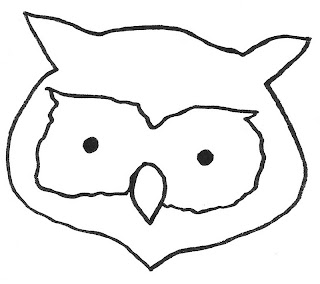
Click on the image to open a new window, and you can print it. It is approx. 4 inches square.
First, I copied the owl face, then my daughter cut it out and colored the owl face.

Then we tore some strips of brown construction paper. You could also use tan or white construction paper for this. We talked about how owls have feathers, and our paper looked like feathers - a little bit.

My daughter glued the owl face onto the bag bottom, where she put her hand to move it up and down.

Then we glued the "feathers" onto the lower part of the bag. Then my daughter wore her puppet for a little...

Here is a picture of my daughter with her owl puppet.

It was a fun day to learn about owls!

Monday, January 23, 2012

Winter banner

Several years ago, I made this WINTER banner or garland, and I really like it! It is sparkly, blue, white and glittery. I like the white and blue, and the contrast it has against my fireplace.
A fun, glittery star/ snowflake on my banner!
Materials:
*Star/ snowflake chipboard shapes (Mine were from Stampin' Up!, you may be able to find some at a craft store)- I used 7 pieces.
*Circle punch or Circle cutter- 2 1/2" circles (6)
*White card stock
*Blue craft ink pad (not dye-based)
*Silver cord
*Build-a-brad, snowflake stamps (optional)
*Rhinestone brads
*Crystal Effects (to make drops/ dots on white)
*Clear beads, to dangle from bottom of each letter, 6 head pins
*Glitter
*Large alphabet stamp set
*Small Hole punch
*Dry emboss snowflake brass set (optional)
One-half of the banner
Directions:
1. Punch out all snowflakes from chipboard that you will use.
2. Stamp them in blue and white craft ink, allow to dry. I embossed mine, and added glitter before they dried.
3. Cut white card stock circles, and stamp W I N T E R on them in blue craft ink. Allow to dry.
4. Punch holes in the top (2)  and bottom (1) center of each circle. Dry emboss snowflakes on circles if desired.
5. Add Crystal Effects and/or glitter to the white circles. Allow to dry.
6. Punch holes in chipboard pieces, so they can hang between letters.
7. Make a hook in the top of each head pin, string one clear bead on each pin, and place through hole on each letter.
8. Add snowflake built brads or rhinestone brads to some of the chipboard pieces.
8. String silver cord through each chipboard piece, letters, and knot the ends. Hang on your fireplace and admire your handiwork!
Showing the head pin and dangling bead...
Showing the embossed snowflake and the Crystal Effects dots...
Left side
Middle
Right side
I know there are lots of steps, but it was fun, and really not too hard. The hardest part for me was waiting for it to dry! ;-D

 Let me know if you make one like this, I'd love to see pictures!

Here is my fall CD banner that I made. Here and here are other banners or garlands that I've made. 

Friday, January 20, 2012

Left-handed

Sorry, no recipe today, cooking all the same old things... I'll try to be more inspired with a new recipe soon!
____________________________________________

There are some lines in our favorite movie, The Princess Bride...
Inigo says, "I admit it, you are better than me." (while in sword battle)
The Man in Black says, "Then why are you smiling?" to Inigo Montoya. 
"There is something you do not know about me..." Inigo says.
"And what is that?" the man says.
"I am not left-handed!" Inigo says. 
"Neither am I", says the Man in Black.

I however, am left-handed. It is not an easy thing to be in this right-hand biased world. Here is an example:

 We have this mug in our house. If you hold the lovely holiday mug in your right-hand, you can see the Rudolph. If you hold it in your left hand, you will not see him.

PROOF of the BIAS!

Here are some of my favorite quotes about being left-handed...


"Then right half of the brain controls the left half of the body. This means that only left-handed people are in their right mind."

"God made everyone right-handed, only the truly gifted overcome it."

____________________________________________
Did you know that there is a day just for Left-handers? August 13, celebrate your right to be left-handed.
Find more info here: http://www.lefthandersday.com/

Here are some little know fascinating facts about lefties, also from the above website.


-Most left-handers draw figures facing to the right. 

-There is a high tendency in twins for one to be left-handed.

-Stuttering and dyslexia occur more often in left-handers (particularly if they are forced to change their writing hand as a child, like King of England George VI). 
Image description-Left-handers adjust more readily to seeing underwater.

-Left-handers excel particularly in tennis, baseball, swimming and fencing.

-Left-handers usually reach puberty 4 to 5 months after right-handers.

-4 of the 5 original designers of the Macintosh computer were left-handed. (maybe that's why I like Macs!)

-1 in 4 Apollo astronauts were left-handed - 250% more than the normal level.

-Left-handers are generally more intelligent, better looking, imaginative and multi-talented than right handers - based on discussions among members of the Left-Handers Club! :)

I am in good company in my family, as my dad and my son are also left-handed. If you are in my kitchen, now you will know why things are set up differently...

Thursday, January 19, 2012

Apples lap book

Here is another lap book that we made several years ago, but it was one of our favorites! We got this lap book as a freebie from Live and Learn Press, and it is still free-- five years later! It is slightly different from the one we have, some of the drawings and graphics, but overall it is very similar. I hope you enjoy seeing our pictures, and will go and get this great freebie for yourself!

Front cover:
We printed with apples and paint, and made an apple acrostic,
which says:
Apples are...
Amazing
Pretty
Plentiful
Lava Colered (my daughter's spelling!)
Excellent for you

Inside front left cover:
-Parts of an apple
-Things you can do with apples


Left flap open:
Did you know...? We wrote facts about apples that we found, such as...
"Did you know... that the apple blossom is the state flower of Michigan?"

Middle of left folder:
-Prediction results- how many seeds will be in my apple-
She guessed 5, and there were actually 8.
-Find the apples word search (types of apples)
-Johnny Appleseed booklet, with a mini-biography of John Chapman.
-Apple sayings- Such as an apple a day...- then we explained them in our own words.
-Varieties of Apples- Macintosh, Pippin, etc.,- She cut and colored them the actual colors.

Right flap of left folder:
-An apple tree through the seasons- We colored each one and discussed them.

Left flap of right folder:
-Apple fractions- one whole equals... two halves, etc.,

Middle of right folder:
-Mr. Applehead and faces in an index card pocket
-My Apple Seed Counting Book
-Apple Tree dot-to-dot
-An apple tree with life cycle order

Right flap of right folder:
-Apple patterns
-Apple baskets, with correct number of apples in each basket

Right flap closed:
-Our applesauce recipe, written by my daughter
-A photo of my daughter making applesauce
-Ingredients in an apple (or applesauce narration- your child can narrate how it's made!)

Back cover: Collect the apples game, rules, pieces and spinner.

We decorated the folder with apple stickers that we had, apples we colored, apple sayings, and other apples in the freebie. It was very interesting to make, and we learned quite a lot! Let me know if you try it and what you think. Thanks, Live and Learn Press for a great lap book!

Wednesday, January 18, 2012

Wordless Wednesday: sleepover

Well, almost wordless!

Here is a photo of a recent photo of her first sleepover that my 5-year-old daughter had with her cousin. Cute girls and their dollies all ready for bed! Enjoy the pic!


It seems I haven't taken too many snapshots lately, I may need to work on that this week!

Tuesday, January 17, 2012

Embarrassed...

I have been blessed in many ways. I have a wonderful family, and amazing husband, four fabulous kids, and much, much more. But I have not been so blessed in the bosom department. There is a reason one of my friends in high school called me, "the boobless wonder." It's not quite that bad, but I do like undergarments that provide me with a little extra. My cups runneth over when I was pregnant, and I was so thankful that I could nurse my babies, all four of them. The same friend from the above quote gave me some fabulous brassieres when I got married. She also advised me with some other undergarments which I purchased at a large women's lingerie store in our local mall.

The bra in this discussion was called a "water bra". It was supposedly filled with water and made to look more realistic or natural. I purchased two, a white one and a black one. I wore the white one more frequently, because the black one was somewhat scratchy. I wore these bras often during our first 5-7 years of our marriage. I don't dispose of my bras too often, they usually have more than one hole before I get rid of them.

One Sunday afternoon in early Spring, my father-in-law, who lives in our town, paid our little family a visit. I was wearing the said white bra under one of my new shirts that I had received for my birthday. We were relaxing, chatting, watching TV, playing with our daughter and son at the time, Rebekah and Caleb.

I began to feel something wet on my shirt. I just thought I had spilled something, since I am not the most coordinated person in the world. But the spot didn't dry like fabric usually dries here in the west, quickly. In fact it seemed to get bigger... ? Weird.

Then it dawned on me that it wasn't just a wet spot, but it was oily. I knew I didn't spill oil on myself. I got to thinking. Where could this spot have come from? Hmmm... then I figured out it was from my BRA! My bra must have had a hole in it, and it was leaking out onto my shirt!

And my father-in-law was there! He probably wondered why I had a spot on my shirt and didn't say anything. What a nice guy, but still... I was quite embarrassed and am embarrassed just thinking about it today!

I know, not a horribly emBRAssing moment, but it was enough for me to never buy a water bra again! I take my padded undergarment cushions in another form! It was tough to get the oil out of that shirt though!

http://www.mamakatslosinit.com/

Monday, January 16, 2012

MLK, Jr. lapbook {repost}/paper dolls {how to}

This is a repost of a lap book that I posted about last year.
You can find the lap book here.

Today we are also reading books about MLK Jr. again, and making paper dolls/people in kindergarten. A few of my mom friends think this is too hard for them, but I assure you it really is easy. It is fun to color kids holding hands, and living together, like Martin Luther King, Jr. spoke about.

Here are some rough directions how to cut your paper. 

First take one sheet of 8 1/2 X 11" white printer paper. Fold it like a hot dog (short side), accordion fold, like this:

 Next, trim off the extra edge, and trim a square out of the bottom.


 Cut up the side, leaving one part on the fold connected. Trim out a rectangle for the arm, and then a circle for the head.

Go around the head, and trim the other side so that it is symmetrical, with an arm, angle for the skirt, and leaving one small part connected, then unfold them.

They should be all connected like this:
GIRLS
BOYS- a triangle for the legs.
You can even tape them together if you want, so they will be a longer line of ten children. Then let your child color them with crayons or colored pencils!

If you can cut paper snowflakes, you can make these! Enjoy!

Friday, January 13, 2012

Ham Pasta Bake

I discovered this easy week-night recipe last Spring. You can find the original recipe/ directions on Econobsuters blog here.

The brands that I use...
Ham Pasta Bake
1 pound chopped cooked ham
1 box penne pasta, cooked according to package directions (I use whole-grain pasta)
1 jar Ragu Alfredo sauce (originally called for Classico Alfredo sauce with roasted red peppers)
1/2 cup Mozzarella cheese, grated
1 small bag frozen peas, cooked (optional)

Mix pasta and pasta sauce together after pasta is done cooking and drained.  Add ham & peas to mix, stirring thoroughly. Top with cheese, and bake in a preheated 350 degree oven for 15-20 minutes. You can cover it with foil for the first 15 minutes, then remove the foil, baking for another 5 minutes so the cheese will be crispy and brown. Serve with veggies or salad.
YUM! It is family -approved!

It really is quite easy, and a nice way to use up leftover ham from Christmas or Easter. I've even frozen bags of chopped ham to use later in this recipe. It will also work with different kinds of pasta, such as bow-ties, wagon wheels, small shells, etc., It is versatile and great on a busy week night! It is also a great meal to have when ham and/or pasta is on sale!

If you try this recipe, let me know your review! Do you have a favorite easy recipe for week-night dinners?I'd love for you to share it in the comments.

Thursday, January 12, 2012

Snowman Earrings!

Here is a festive pair of earrings that you can make and wear in December AND January! I saw these somewhere two years ago and loved them. I have a snowman collection at home, so I knew they'd be a fun thing to add to my festive jewelry. 


To make them, you'll need:
two square black beads
two flat round black beads
six pearls (real or faux), two sizes
two flat silver beads
pair of earring wires
wire or head pins
My pretties kit from Stampin' Up!

String of square black beads from a local bead store...

Directions:
Thread two pearl beads onto head pin.
Thread flat silver bead, then smaller pearl.
Thread flat black bead and top with square bead.
Curl and crimp top of head pin onto earring wire.
Repeat for second earring.

Simple, easy and cute! 
Let me know if you have any questions or don't understand my directions. 
Related Posts Plugin for WordPress, Blogger...