Friday, March 30, 2012

Cake pops!

For Rebekah's birthday cake, I made this recipe for the cake. I tripled the recipe so we would have enough cake for our friends and family, and to make it into a surfboard. You can see the picture of the surfboard cake here. Well, I ended up making them twice... The first time I didn't take them out of the pans before I went to bed. Not good. I woke up in the morning and realized what I'd done. I tried getting the cakes out of the pans then... and ended up with a big mess. {Tears} In my frustration, my hubby's answer was-- "we can make cake pops!" I told him I didn't have time, so he and our daughter made them! He found a recipe online, and off they went to the craft store for supplies.


Here is their basic recipe and pictures:

In a large bowl...

Roll into balls...

 They dipped the sticks into white candy-coating first.
 We melted Candy Melts in several bowls, we had four colors: chocolate/ brown, white, green and blue. We sprinkled some of them with sprinkes (let them dry a wee bit after applying the candy coating)
Anyone else love "Princess Bride"?

Some of them we covered in one color, allowed them to dry and swirled them with another color. Some of them we put chopped nuts on, and a few had coffee beans stuck in the top-- ala Starbucks! Yum!
I did help them some on Friday, it was fun to make them and we've been enjoying and sharing them ever since! YUM!

Thursday, March 29, 2012

American Girl class: Samantha Week 3

We had another great American Girl class this week. We discussed Samantha's Surprise, which is book 3 in the series. The book was a Christmas-themed book. I wish I had paid better attention to my stories and schedule when I made it in advance, we could have had gingerbread men for snack. Oh well, we'll have them next week!

 I had originally planned to make this week's craft last week, another schedule change. It worked fine this week! We used baby food jars (donated from a mom in our homeschool group) to make a mini-terrarium/ glass paperweight. Samantha's Craft Book explained this craft quite well.

Here are the supplies that we used:
One baby food jar per girl
1/4 of one piece of brown felt (they could have had a little less?)
1/6th of a piece of cardstock (8 1/2 X 11)
Craft glue
Piece of satin cord, 7" long
Small objects: seashells, artificial flowers, stones, pinecones or toys (we used shells and two colors of flowers)
Scissors, pencil

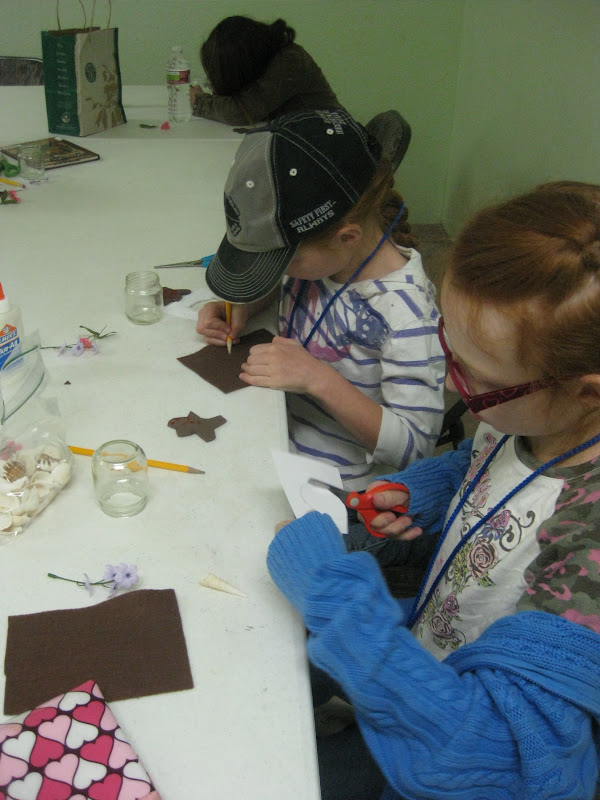
The girls traced the opening of the jar onto the white cardstock. (It's important they cut it very well, since this is the closure to the jar!) They cut it out and traced/cut the felt the same way. We glued the cardstock to the brown felt piece and let it dry a little. The girls took their shell and flowers and arranged them onto the white piece. Once it was arranged the way that they liked, they glued their small items down. We put glue onto the rim of the baby food jar and carefully placed it on top of the white piece and small items. Lastly, we took the red cord and glued it around the jar as a decoration. Allow to dry.

They turned out very nice! While they made them, I read this piece about the history of the terrarium.

Tracing gingerbread men, waiting for the tracer...

PLACING ITEMS IN THEIR TERRARIUMS...
THE BRAIDING WEB!
We had "Corn Oysters" for snack. They were like Corn Fritters or Corn Pancakes-- no shellfish involved, I don't know why they call them that! You can find the recipe here.

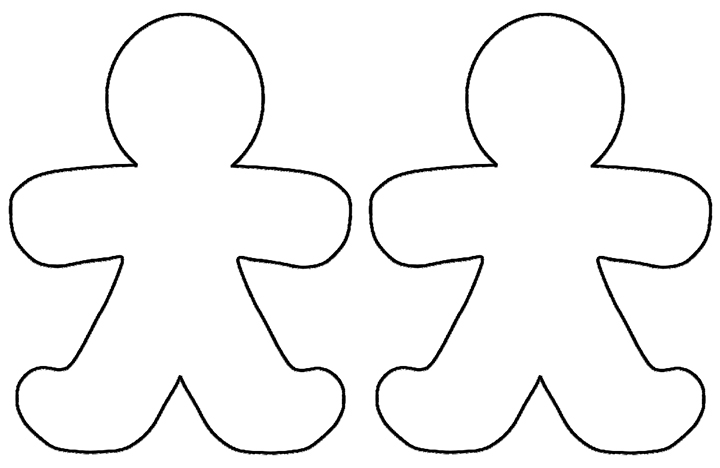
For our second craft, we made fun foam gingerbread men magnets. I found this pattern online, and printed four-six of them, and cut them out. Each girl got a small piece of fun foam (2 1/2 X 3") and a magnet strip. I found lengths of magnets at Jo-Ann's for really cheap! I used one 12 X 18" piece of brown fun foam for my classes (22 girls). The girls traced the gingerbread man, cut it out and colored on it with a red marker. Then they applied the magnet to the back (it was already sticky). They really liked them!
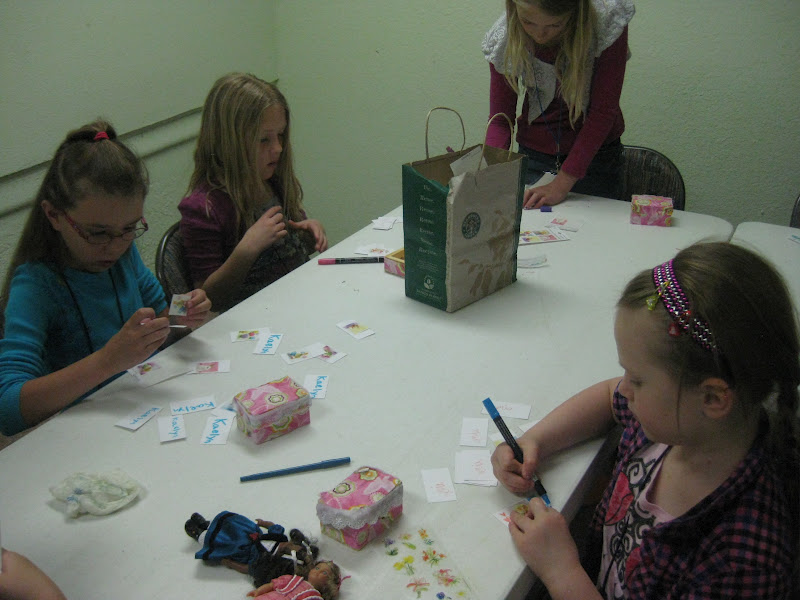
The 2:00 class...


CHATTING AND CRAFTING...
THE GIRL ON THE RIGHT WAS WEARING AN AMERICAN GIRL HAT!

We also had time to make our braided rugs again. It was very enjoyable class day! I can hardly believe we only have three weeks left!?!

Wednesday, March 28, 2012

Wordless Wednesday: New Microwave!

(Well, almost wordless!)

This past Saturday, our microwave decided not to work. We tried it a few different ways to no avail. It has given us problems before, so we decided we'd better replace it. So after a trip to the Habitat for Humanity Restore and finding nothing, we went to Sears. We found a great new microwave!

Here are the pics:
OLD ONE...
THE HOLE...

SHINY AND NEW!
I'm happy we were able to get a new one right away! And it's SO white in our kitchen! At least the white matches the fridge...

Tuesday, March 27, 2012

My March Mantle

Some of you may recall that last week I posted about an Irish blessing that I had found online. In that post I also talked about putting green taper candles in white vases, as I found on another blog, you can see that post here.

(SORRY IT'S KINDA BLURRY...)
CLOSE-UP OF MY FRAMED IRISH BLESSING...
 Another decoration that she had on her blog post was the tall "Mexican" candles (for lack of a better description, sorry for the non-P.C. remark...). She took the label off of her candles and wrapped them with lace and St. Patrick's Day ribbon. I found some ribbon at the craft store recently, so I picked that up too. 
 I used the same green ribbon to wrap around the vases too. I found another white vase at Goodwill and I like the contrast it has with the green candle. I also found a little green candleholder at Goodwill and added that to my mantle/ March decorations.


 I've been enjoying the fun decos for March, it is fun to have a little something different out for this month! My Happy Spring banner is also hanging from the fireplace shelf. And one of the best parts is that it was pretty inexpensive-- I used vases, which I had, bought the candles and ribbon, and the frame, but it was probably under $8 total! I'll be able to use the glass/ lace-wrapped candles again next year!
FESTIVE AND FUN!

Monday, March 26, 2012

Spring Crafts {Kindergarten}

This past week in our Kindergarten, we discussed St. Patrick's Day and Spring. On Monday, we discussed St. Patrick, read some books about him and made this little art project:
My daughter traced three hearts and cut out a stem. It was cute and simple! We also discussed clovers and shamrocks.

We also made our own imitation of a daffodil, a flower which usually blooms in Spring. We used a piece of yellow crepe paper (think streamers), a white cupcake paper (we didn't have any yellow) and a green pipe cleaner. I cut out a star/flower shape from the crepe paper. I poked a hole in the middle. Then we folded the cupcake liner down so it looked like the middle of the flower- the trumpet. We poked a hole in the cupcake liner and put the crepe paper then cupcake liner onto the pipe cleaner. We curled the end of the pipe cleaner over onto itself and pulled it down into the center. Lastly, we added orange to the edges of the trumpet with an orange marker. 
I love our three-dimensional flower!
On Thursday, we talked about apricot trees and how they bloom in Spring. We sang this song:
I looked out the window and what did I see? (Make hands into binoculars)
Popcorn popping on the apricot tree! (Flick fingers open and closed)
Spring has brought me such a nice surprise,
blossoms popping right before my eyes. (Flick fingers open and closed)

I could take an armful and make a treat. (Swoop arms out and bring in)
A popcorn ball that would smell so sweet! (Cup hands together to make a popcorn ball, then bring to your nose to smell it)
It wasn't really so... (Wag finger back and forth)
But it seemed to be... (Nod head)
Popcorn popping on the apricot tree! (Flick fingers out)


You can listen to it being sung on YouTube here.
Then we made popcorn on our own stove (using our Whirly Pop)and had a little snack while Mallory colored her tree and glued popcorn onto it. You can find the tree printable here.
Her completed tree:
A few pictures of apricot tree blossoms that we looked at:
It was another fun school week!

Friday, March 23, 2012

Slushy Fruit Salad {Recipe}

You may need a young helper to cut the fruit!
This is a refreshing fruit salad that we had many years ago at a church potluck. I really loved its flavors so  I asked for the recipe. We made it recently at our daughter's birthday party and it was a hit! It would be best on a hot summer day. Since our party was a surfing one, maybe we were wishing for summer!
 Prepare one day ahead: 3 cups sugar and 3 cups water. Bring to a boil, when clear, remove from heat.

Then add: 1 -12 oz can of frozen orange juice.

Let cool a little bit, then add:
1 -15 oz can of crushed pineapple with juice
1- 15 oz can drained chunk pineapple
6 or more sliced bananas
1 quart sliced strawberries
2 cups halved grapes

*Mix and freeze 24 hours, stir occasionally.

The sauce getting clear...
Orange juice added and mixed in...
All mixed up and ready to freeze...
After freezing, ready to eat! YUM!
Let me know if you try this recipe, I'd love to hear your review!

Thursday, March 22, 2012

American Girl class: Samantha Week 2

This week in our American Girl class, after discussing Samantha Learns a Lesson, we made "Calling Card boxes" which were small wooden boxes that cards were placed in, when someone came to "call" or visit, and you weren't home. The calling cards were like business cards, before telephones and email was popular! Many homes had a place in the parlor to put calling cards, and would check the box or holder when they arrived back home. This is what our boxes looked like:
The girls had fun decorating the wooden boxes with fabric (cut to size) and lace around the top with glue. As they dried, we made calling cards to go inside of the box, and made enough to trade with one another. They each got a stack of 10 (or 12 for the 2:00 class) and a sheet of stickers to decorate them. They each wrote their name on the cards too. 
GIRLS GLUING ON THEIR FABRIC...
 For snack we had carrot soup. You can find the recipe here.

THE GIRLS MOSTLY LIKED THE SOUP,
A FEW WEREN'T SO SURE ABOUT IT...
DECORATING CALLING CARDS...
 The 2:00 class...
GLUING FABRIC ON THEIR WOOD BOXES...

PUTTING STICKERS ON THEIR CALLING CARDS...


At the end of the class, I had each girl go around and pass out her cards. This eliminated some chaos and ensured each girl got all of the others' cards. We talked about how to curtsy and practiced curtsying in class. You can find some general directions on the proper curtsy here. It was another fun class day!

Teacher's Note: the wood boxes were ordered on eBay, since I could only find one or two at the craft store. For the fabric, I used some "fat quarters" or end rolls of fabric that I found on sale. It was plenty of fabric! They each got 12" of lace for their box. We didn't have time to make our braided rugs, maybe next week!
Related Posts Plugin for WordPress, Blogger...